Before you begin
Create a Chatwoot account
Sign up at Chatwoot if you don’t already have an account.
Complete mandatory setup
- Add agents: Chatwoot agent setup
- Create a channel and inbox: Chatwoot channel setup
- You can skip the webhook URL for now.
Get your access token
Open your avatar menu in the bottom-left, scroll to the Account settings section, and copy the Access token.
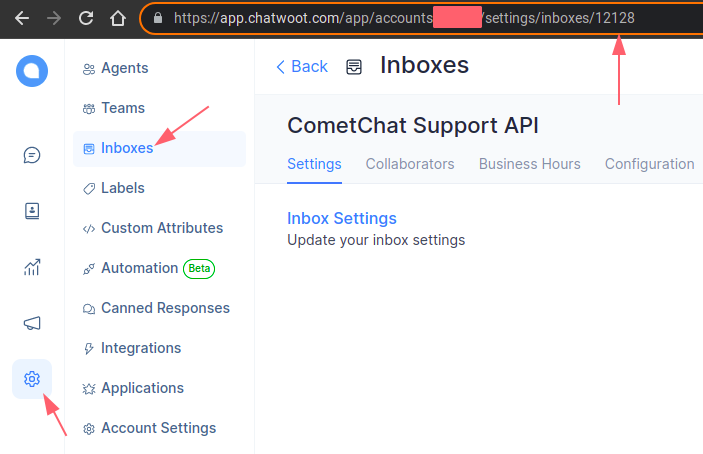
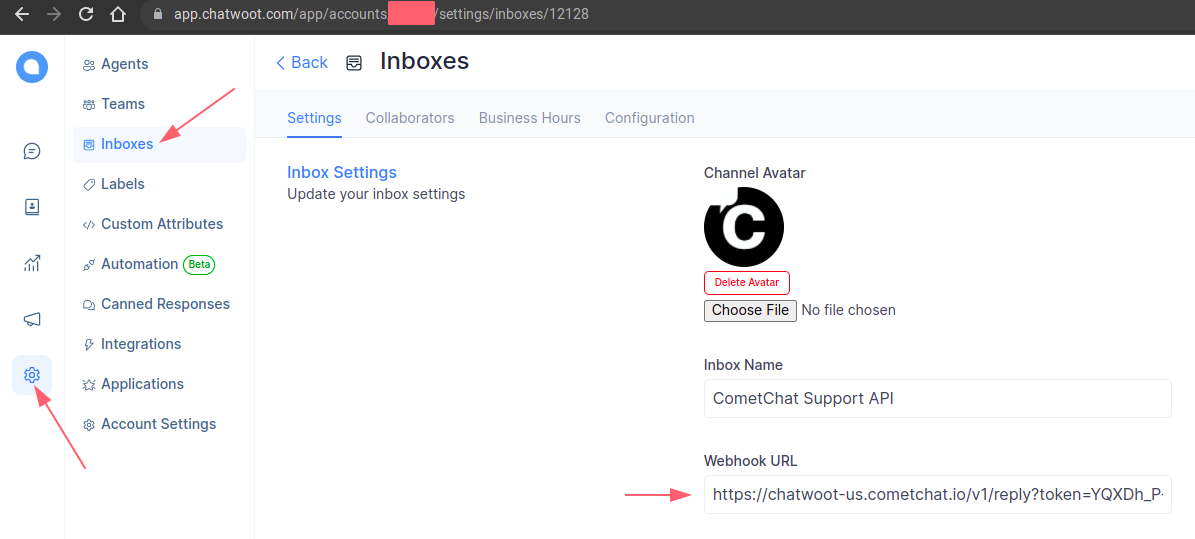
Get your Inbox ID
Go to Settings → Inboxes, open the target inbox, and copy the Inbox ID from the URL.
Example:
https://app.chatwoot.com/app/accounts/123/settings/inboxes/12128 → Inbox ID is 12128.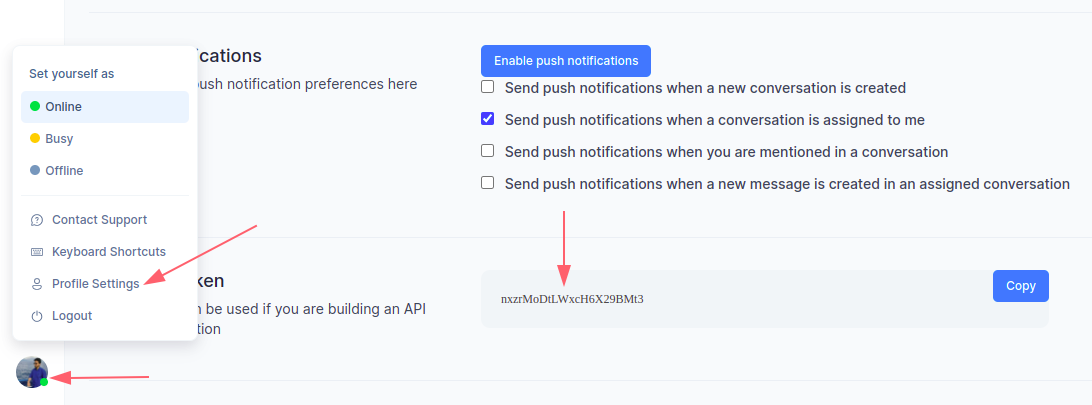
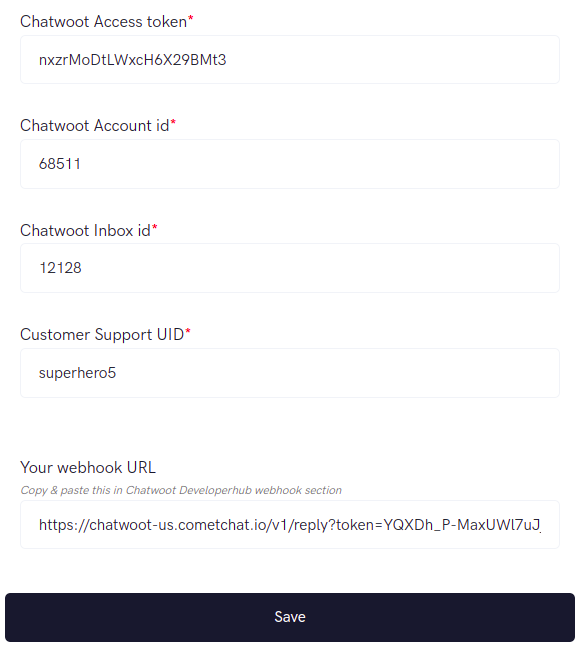
Extension settings
On CometChat Dashboard
Open your CometChat app
Login to CometChat and select your app.
On Chatwoot Dashboard
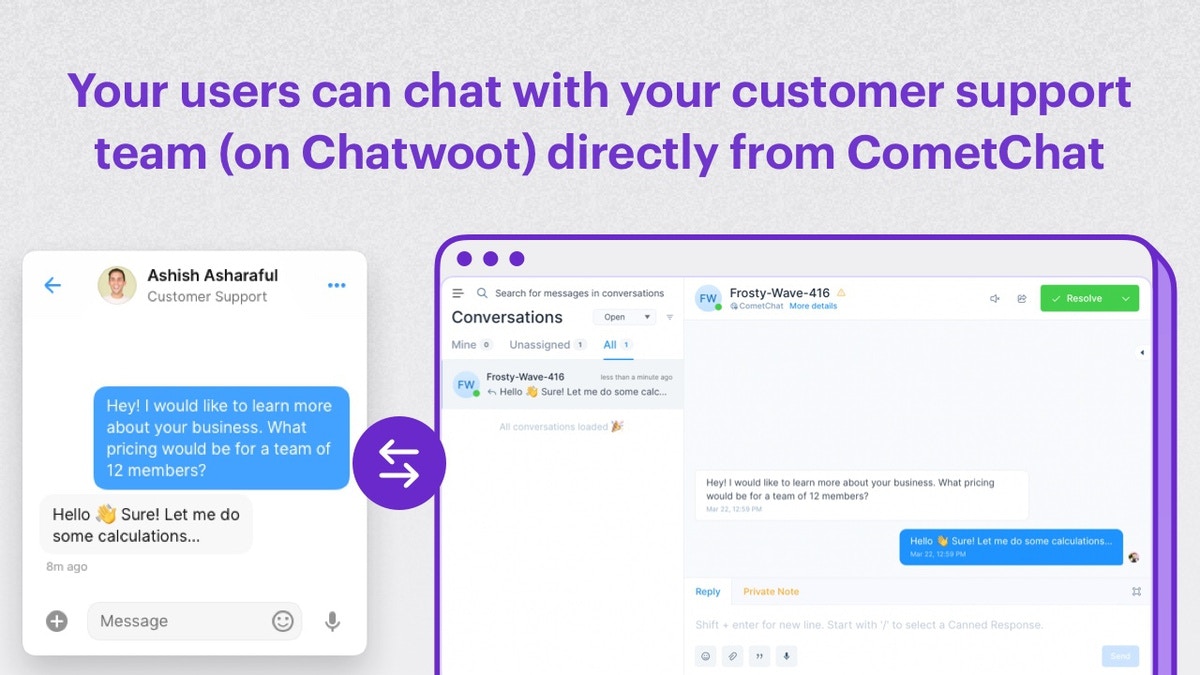
How does it work?
- The end users of your app can send queries to the Customer Support user that you have set in the extension’s settings.
- These queries will be forwarded to the configured Chatwoot inbox.
- When an agent replies to the queries, those will be sent over to CometChat and received by your end user.
- With this, your end users can communicate with each other as well as your Customer support team using the same Chat interface.